こんにちは。新規サービス開発部の中村です。普段は「たべドリ」アプリの開発をしています。「たべドリ」は料理の学習アプリです。詳細はこちらの記事をご覧ください。本記事では UICollectionView でページングスクロールを実装する方法について解説します。
概要


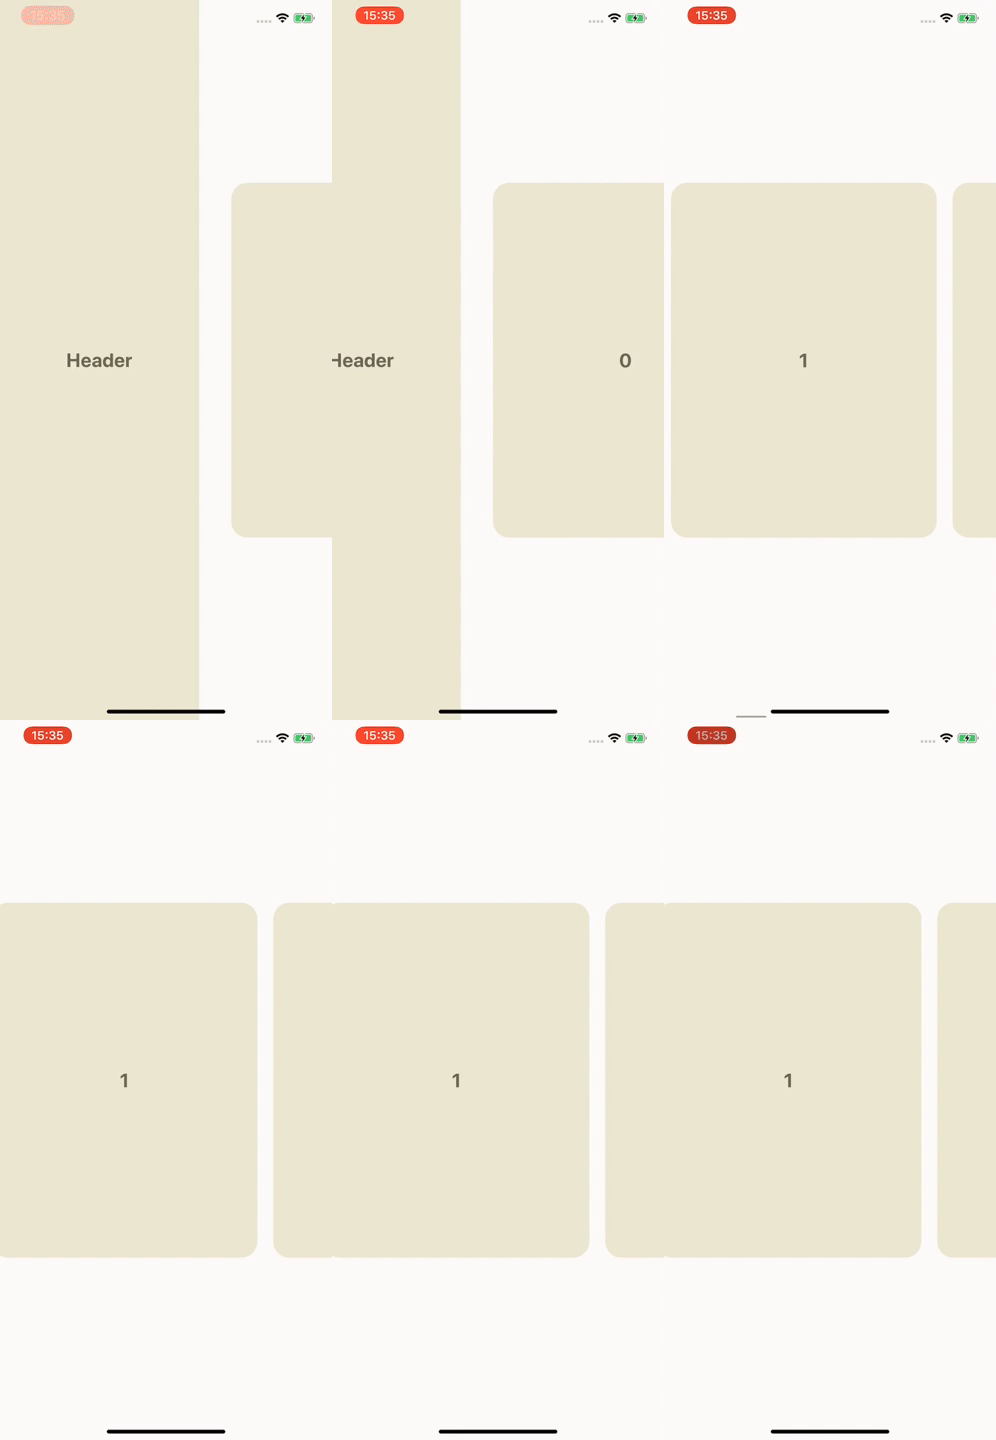
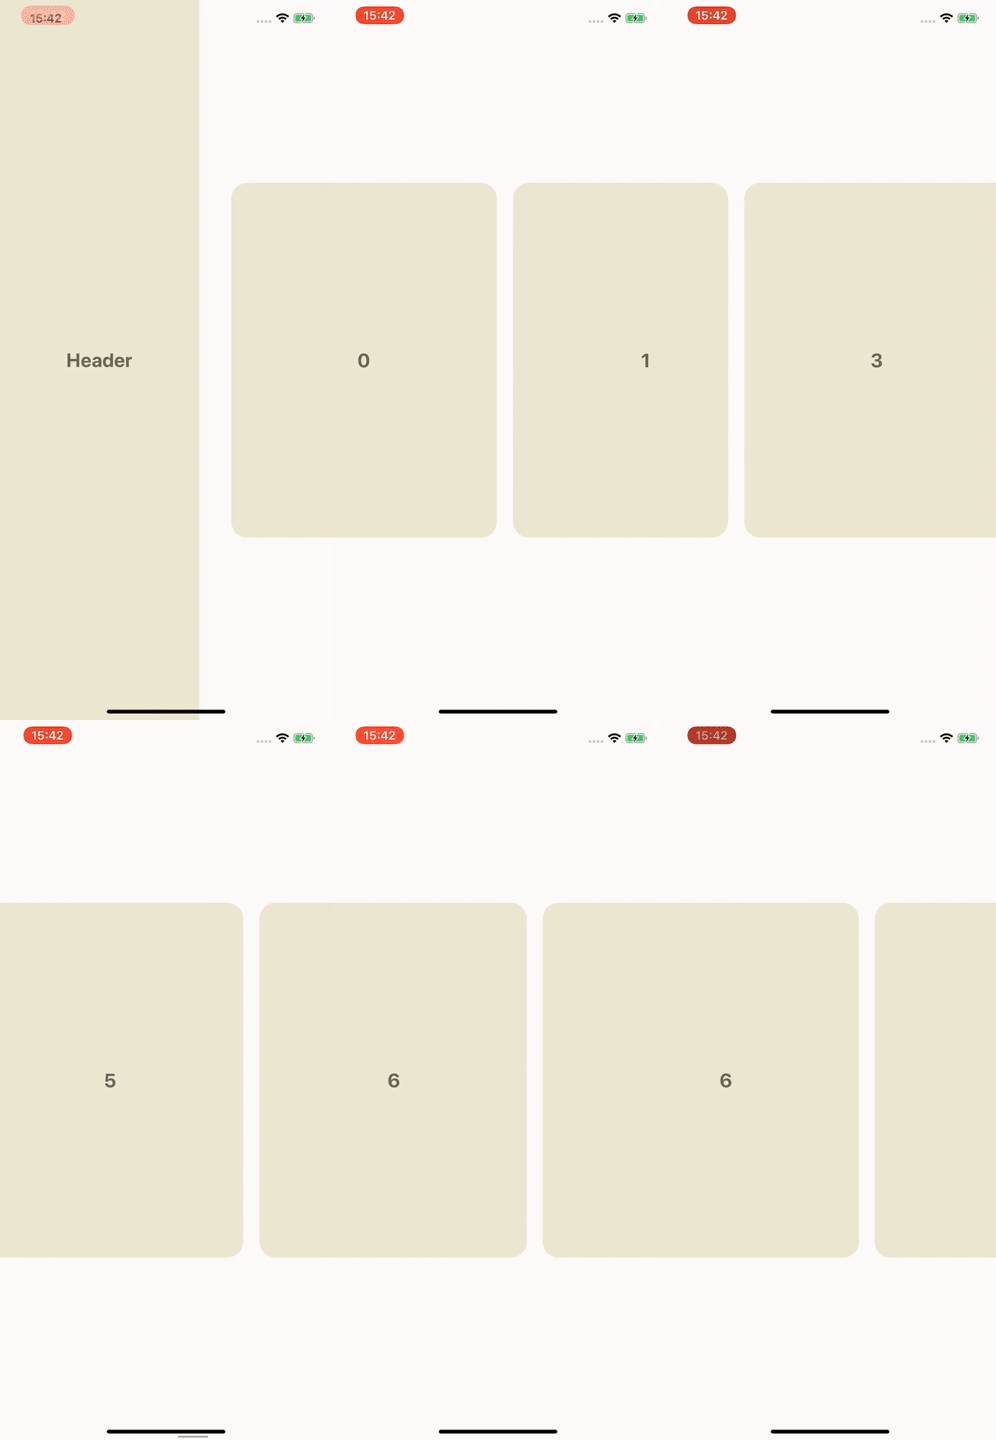
上記画像が今回解説する iOS アプリのUIです。左右のコンテンツが少し見えているカルーセルUIで、以下の要件を満たすものです。
- 先頭にヘッダーを表示する
- セルが水平方向にページングスクロールする
色々な実装方法があると思いますが、今回はヘッダーがあるため複数の異なる幅のViewを表示させながら、ページングスクロールを実現する方法を解説します。実装のポイントは以下の2点です。
UICollectionViewFlowLayoutのサブクラスを作成しtargetContentOffset(forProposedContentOffset:withScrollingVelocity:)メソッドをオーバーライドしてUICollectionViewのcontentOffsetを計算するUICollectionViewのdecelerationRateプロパティに.fastを指定する
以降、実装方法の詳細を解説していきます。
ベースとなる画面の作成
まずベースとなる画面を作成します。UICollectionViewController UICollectionViewFlowLayoutを使いヘッダーとセルを表示します。UICollectionViewFlowLayoutのscrollDirectionプロパティは.horizontalを指定し横スクロールさせます。ヘッダーとセルのサイズ、セクションとセルのマージンは任意の値を指定します。
ViewController.swift

override func viewDidLoad() {
    ... (省略)
    flowLayout.scrollDirection = .horizontal
    flowLayout.itemSize = cellSize
    flowLayout.minimumInteritemSpacing = collectionView.bounds.height
    flowLayout.minimumLineSpacing = 20
    flowLayout.sectionInset = UIEdgeInsets(top: 0, left: 40, bottom: 0, right: 40)
}

... (以下 UICollectionViewDataSource は省略)

ここまではUICollectionViewControllerの基本的な実装です。
isPagingEnabled プロパティ
ページングスクロールさせたい場合、最初に試したくなるのがUIScrollViewのisPagingEnabledプロパティをtrueに指定することですが、この方法ではセルが画面の中途半端な位置に表示されてしまいます。これはcollectionViewの横幅の単位でスクロールされるためです。この方法でもセルの幅をcollectionViewの横幅と同じ値に設定し、セルのマージンを0に指定することで画面中央にセルを表示させることが可能です。しかし、今回はセルの幅と異なる幅のヘッダーも表示させる必要があるためこの方法では実現できません。

セルを画面中央に表示する
そこでUICollectionViewFlowLayoutのサブクラスを作成しtargetContentOffset(forProposedContentOffset:withScrollingVelocity:)メソッドをオーバーライドします。このメソッドはユーザーが画面をスクロールして指を離した後に呼ばれます。メソッドの戻り値はスクロールアニメーションが終わった後のcollectionViewのcontentOffsetの値となります。このメソッドを以下のように実装します。
FlowLayout.swift

override func targetContentOffset(forProposedContentOffset proposedContentOffset: CGPoint, withScrollingVelocity velocity: CGPoint) -> CGPoint {
    guard let collectionView = collectionView else { return proposedContentOffset }

    // sectionInset を考慮して表示領域を拡大する
    let expansionMargin = sectionInset.left + sectionInset.right
    let expandedVisibleRect = CGRect(x: collectionView.contentOffset.x - expansionMargin,
                                      y: 0,
                                      width: collectionView.bounds.width + (expansionMargin * 2),
                                      height: collectionView.bounds.height)

    // 表示領域の layoutAttributes を取得し、X座標でソートする
    guard let targetAttributes = layoutAttributesForElements(in: expandedVisibleRect)?
        .sorted(by: { $0.frame.minX < $1.frame.minX }) else { return proposedContentOffset }

    let nextAttributes: UICollectionViewLayoutAttributes?
    if velocity.x == 0 {
        // スワイプせずに指を離した場合は、画面中央から一番近い要素を取得する
        nextAttributes = layoutAttributesForNearbyCenterX(in: targetAttributes, collectionView: collectionView)
    } else if velocity.x > 0 {
        // 左スワイプの場合は、最後の要素を取得する
        nextAttributes = targetAttributes.last
    } else {
        // 右スワイプの場合は、先頭の要素を取得する
        nextAttributes = targetAttributes.first
    }
    guard let attributes = nextAttributes else { return proposedContentOffset }

    if attributes.representedElementKind == UICollectionView.elementKindSectionHeader {
        // ヘッダーの場合は先頭の座標を返す
        return CGPoint(x: 0, y: collectionView.contentOffset.y)
    } else {
        // 画面左端からセルのマージンを引いた座標を返して画面中央に表示されるようにする
        let cellLeftMargin = (collectionView.bounds.width - attributes.bounds.width) * 0.5
        return CGPoint(x: attributes.frame.minX - cellLeftMargin, y: collectionView.contentOffset.y)
    }
}

// 画面中央に一番近いセルの attributes を取得する
private func layoutAttributesForNearbyCenterX(in attributes: [UICollectionViewLayoutAttributes], collectionView: UICollectionView) -> UICollectionViewLayoutAttributes? {
    ... (省略)
}
velocity引数をもとにユーザーが左右どちらにスワイプしたか、またはスワイプせずに指を離したかの判定をしています。スワイプしていない場合は画面中央に近いUICollectionViewLyaoutAttributesをもとに座標を計算します。ユーザーが左にスワイプした場合は取得したUICollectionViewLayoutAttributes配列の最後の要素、右スワイプの場合は最初の要素をもとに座標を計算します。これでセルを画面中央に表示できます。

セルの位置は期待通りになりましたが、スクロールの速度が緩やかなのでスナップが効いた動きにします。UIScrollViewのdecelerationRateプロパティを.fastに指定するとスクロールの減速が通常より速くなりスナップの効いた動作となります。
collectionView.decelerationRate = .fast

1ページずつのページング
これで完成したように見えますが、スクロールの仕方によっては1ページずつではなくページを飛ばしてスクロールしてしまうことがあります。これを防ぎたい場合targetContentOffset(forProposedContentOffset:withScrollingVelocity:)メソッドで取得しているUICollectionViewLayoutAttributes配列の取得タイミングを、スクロールする直前に変更し、それをもとに座標を計算することで解決できます。以下のように実装を追加・変更します。
FlowLayout.swift

... (省略)

private var layoutAttributesForPaging: [UICollectionViewLayoutAttributes]?

override func targetContentOffset(forProposedContentOffset proposedContentOffset: CGPoint, withScrollingVelocity velocity: CGPoint) -> CGPoint {
    guard let collectionView = collectionView else { return proposedContentOffset }
    guard let targetAttributes = layoutAttributesForPaging else { return proposedContentOffset }

    ... (省略)
}

... (省略)

// UIScrollViewDelegate scrollViewWillBeginDragging から呼ぶ
func prepareForPaging() {
    // 1ページずつページングさせるために、あらかじめ表示されている attributes の配列を取得しておく
    guard let collectionView = collectionView else { return }
    let expansionMargin = sectionInset.left + sectionInset.right
    let expandedVisibleRect = CGRect(x: collectionView.contentOffset.x - expansionMargin,
                                      y: 0,
                                      width: collectionView.bounds.width + (expansionMargin * 2),
                                      height: collectionView.bounds.height)
    layoutAttributesForPaging = layoutAttributesForElements(in: expandedVisibleRect)?.sorted { $0.frame.minX < $1.frame.minX }
}
ViewController.swift

... (省略)

extension ViewController: UICollectionViewDelegateFlowLayout {
    override func scrollViewWillBeginDragging(_ scrollView: UIScrollView) {
        let collectionView = scrollView as! UICollectionView
        (collectionView.collectionViewLayout as! FlowLayout).prepareForPaging()
    }
    ... (省略)
}
UIScrollViewDelegateのscrollViewWillBeginDragging(_:)が呼ばれたタイミングでprepareForPaging()メソッドを呼びます。このメソッドでスクロール直前のUICollectionViewLayoutAttributes配列をlayoutAttributesForPagingプロパティに保存しておき、targetContentOffset(forProposedContentOffset:withScrollingVelocity:)メソッドの中で保存した配列をもとに座標を計算するように変更します。これで1ページずつページングできるようになりました。
おわりに
本記事では UICollectionView でページングスクロールを実装する方法を解説しました。このようなUIを実装することは稀だとは思いますが、何かの参考になれば幸いです。
サンプルプロジェクトはこちらhttps://github.com/nkmrh/PagingCollectionViewです。
料理のやり方を1から学んでみたいという方は、ぜひ「たべドリ」を使ってみて下さい!!
apps.apple.comクックパッドでは新規サービス開発もやりたい、UI・UXにこだわりたいエンジニア・UXエンジニアを募集しています!!!

