Hi, this is Chris Trott (@twocentstudios) from Cookpad Mart's iOS team.
In this post I want to share a few tips for how to draw shapes using paths in SwiftUI, starting from the basics. The code in this post targets iOS 16 and Xcode 14, but is low-level enough that it should be relatively forward and backward compatible.
Drawing paths manually is not a common task in day-to-day app work. It can be especially tedious for complex shapes. However, it can sometimes be a most prudent choice over bitmaps or 3rd party rendering libraries.
You can view the complete code from this post from this gist.
Contents
- Basic shapes
- Styling
- Drawing line-by-line
- How to use arcs
- How to use quadratic bezier curves
- Path operations
- Creating a chat bubble shape
- Trimming a path
- Transition animations
Basic shapes
SwiftUI has a protocol Shape – both conforming to, and conceptually similar to View – that we can use to draw custom shapes.
protocol Shape : Animatable, View
It has one requirement: a function that takes a CGRect and returns a Path.
import SwiftUI

struct MyCustomShape: Shape {
    func path(in rect: CGRect) -> Path {
        /// TODO: return a `Path`
    }
}
As we'll see later, the input rect is determined by SwiftUI's layout system rules, but the path we return can draw anywhere, including outside the bounds of rect.
Path is SwiftUI's drawing command primitive, while UIKit has UIBezierPath and CoreGraphics has CGPath. All are similar, but not quite the same.
Let's use SwiftUI's Path primitives to make a simple rounded rectangle.
struct RoundedRectShape: Shape {
    func path(in rect: CGRect) -> Path {
        Path(roundedRect: rect, cornerRadius: 20)
    }
}
Of course this is the same as SwiftUI's built-in shape:
RoundedRectangle(cornerRadius: 20)
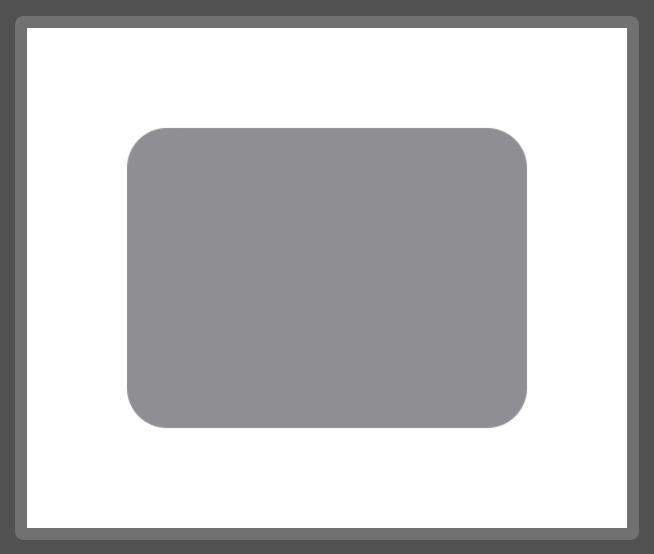
A Shape has only a "default fill based on the foreground color", so let's add a SwiftUI Preview for it.
struct RoundedRectView_Previews: PreviewProvider {
    static var previews: some View {
        RoundedRectShape()
            .fill(.gray)
            .frame(width: 200, height: 150)
            .padding(50)
            .previewLayout(.sizeThatFits)
    }
}
Why not make a custom view modifier for making previewing more convenient:
extension View {
    @ViewBuilder func previewingShape() -> some View {
        frame(width: 200, height: 150)
            .padding(50)
            .previewLayout(.sizeThatFits)
    }
}

struct RoundedRectView_Previews: PreviewProvider {
    static var previews: some View {
        RoundedRectShape()
            .fill(.gray)
            .previewingShape()
    }
}
Styling
Before we get too far into the weeds with Path, we should take a look at basic Shape styling. Otherwise, how will we be able to see what we're drawing?
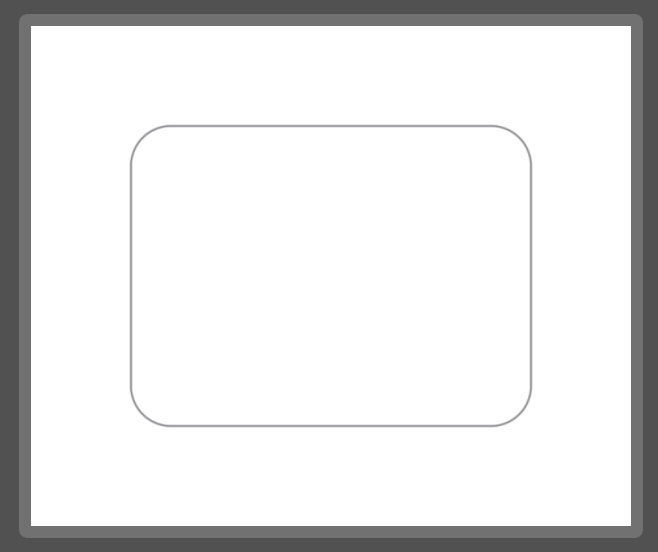
We can either stroke or fill a shape instance, but not both. This is because .stroke and .fill are both defined on Shape but return a View.
RoundedRectShape()
    .fill(.gray)
RoundedRectShape()
    .stroke(.gray)
RoundedRectShape()
    .stroke(.gray)
    .fill(.gray) // Error: Value of type 'some View' has no member 'fill'
| Fill | Stroke |
|---|---|
|
 |
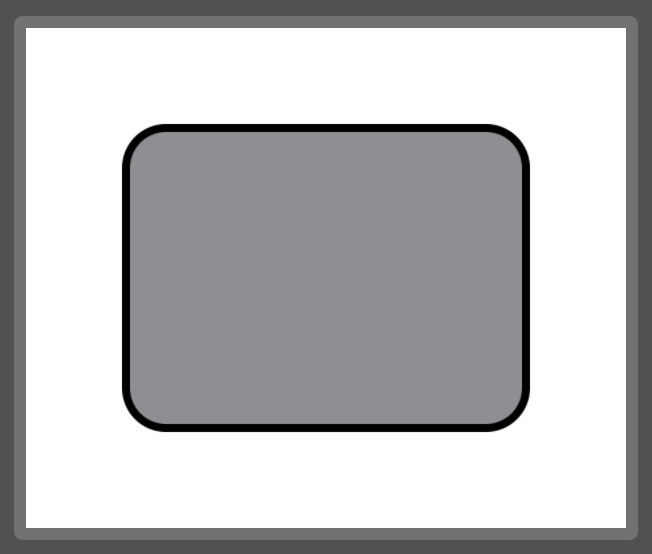
To do both, we need to layer two separate instances of the shape:
ZStack {
    RoundedRectShape()
        .fill(.gray)

    RoundedRectShape()
        .stroke(Color.black, lineWidth: 4)
}
Drawing line-by-line
We draw a path line-by-line or curve-by-curve as if we were describing pen strokes to a friend.
move(to:)moves the "cursor" without drawing.addLine(to:)draws a line from current "cursor" to the thetopoint.closeSubpath()marks the subpath as closed by drawing a line from the "cursor" back to the start point if necessary.
Note: it's required to call
move(to:)before adding a line or curve. Otherwise the path will not appear. When adding a complete subpath likeaddEllipse(in:),move(to:)is not required.
Let's draw a banner shape, starting from the bottom left corner:
struct BannerShape: Shape {
    func path(in rect: CGRect) -> Path {
        return Path { p in
            p.move(to: .init(x: rect.minX, y: rect.maxY))
            p.addLine(to: .init(x: rect.minX, y: rect.minY))
            p.addLine(to: .init(x: rect.maxX, y: rect.midY))
            p.closeSubpath()
        }
    }
}
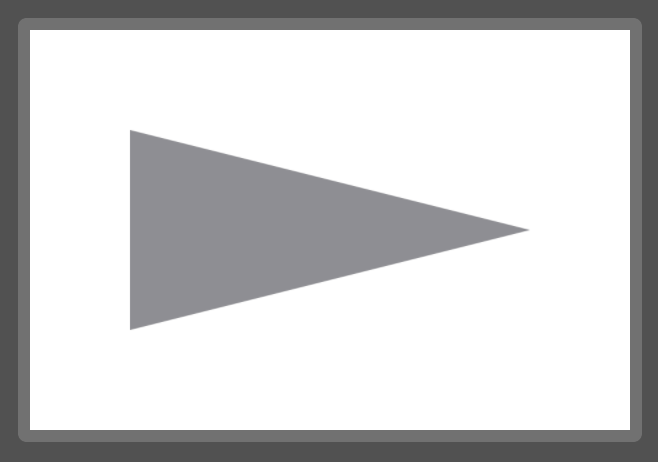
Since we're using the rect parameter to specify our drawing points, the shape will always be relative to the size of the view.
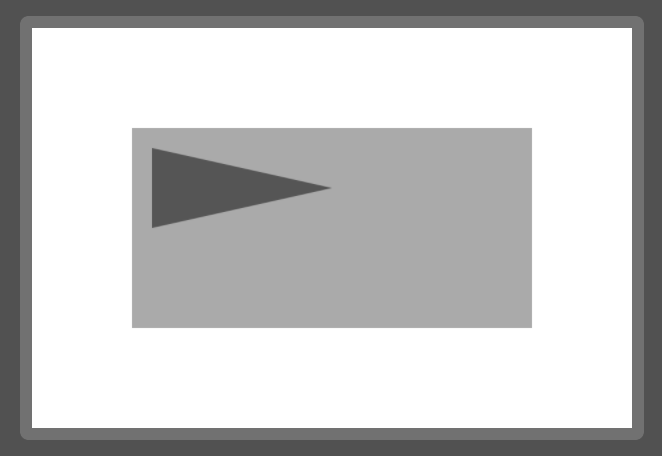
We could also specify absolute coordinates:
struct BannerAbsoluteShape: Shape {
    func path(in rect: CGRect) -> Path {
        return Path { p in
            p.move(to: .init(x: 10, y: 50))
            p.addLine(to: .init(x: 10, y: 10))
            p.addLine(to: .init(x: 100, y: 30))
            p.closeSubpath()
        }
    }
}
And you can see from the lighter gray background color I've added to the view that the path that defines the shape no longer fills it.
How to use arcs
There are three APIs for drawing an arc:
/// Adds an arc of a circle to the path, specified with a radius and a
/// difference in angle.
public mutating func addRelativeArc(center: CGPoint, radius: CGFloat, startAngle: Angle, delta: Angle, transform: CGAffineTransform = .identity)

/// Adds an arc of a circle to the path, specified with a radius and angles.
public mutating func addArc(center: CGPoint, radius: CGFloat, startAngle: Angle, endAngle: Angle, clockwise: Bool, transform: CGAffineTransform = .identity)

/// Adds an arc of a circle to the path, specified with a radius and two
/// tangent lines.
public mutating func addArc(tangent1End p1: CGPoint, tangent2End p2: CGPoint, radius: CGFloat, transform: CGAffineTransform = .identity)
The first two add a new subpath disconnected from the current path.
The last one – using tangents – adds an arc connected to the current subpath. We can use this API to add an arc to a line-by-line drawing session like the banner above.
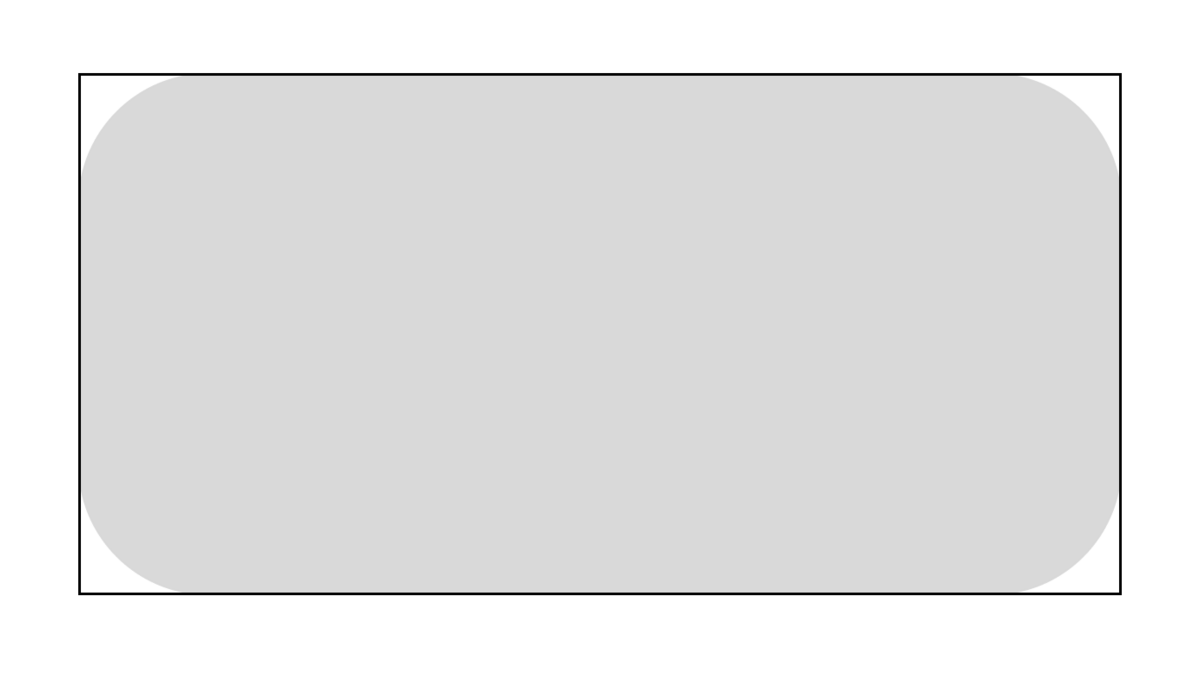
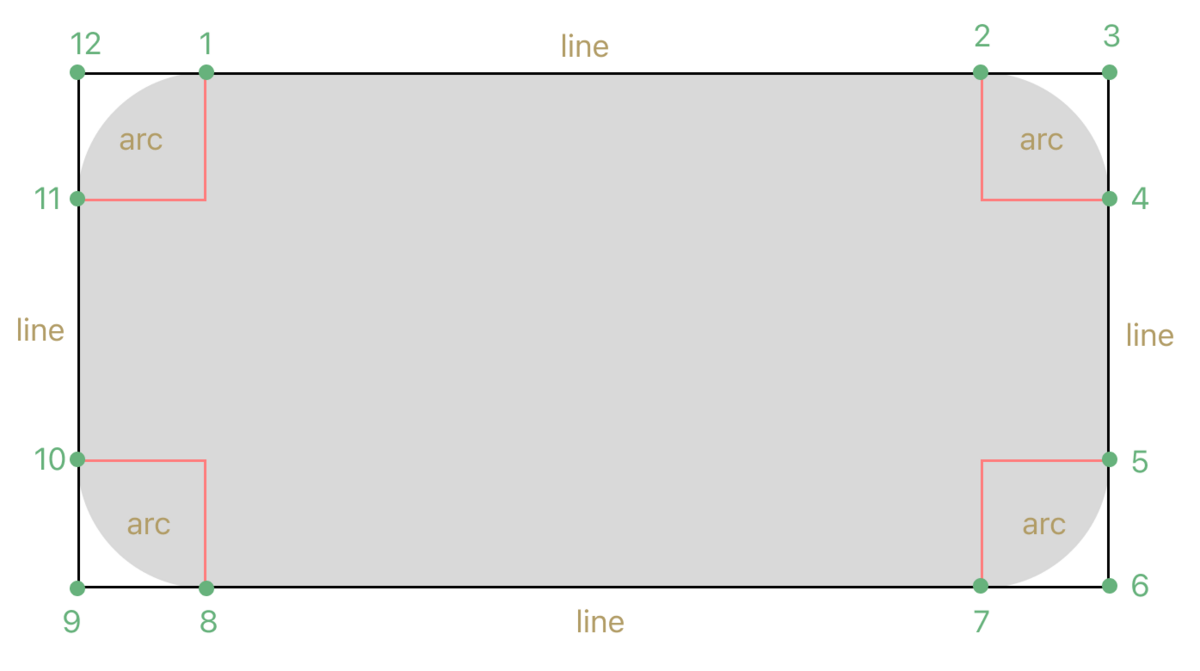
Let's create the rounded rectangle shape with only the addLine and addArc primitives. It should take a corner radius as a parameter and draw inside the provided bounds rectangle.
First, we'll visualize what we want to draw. The black-outlined rectangle is a representation of our input rectangle and the gray-filled shape is the target shape we want to draw.
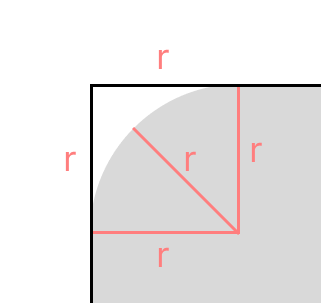
The corner radius r can be visualized as a square, situated at each corner of the bounds rectangle, with side r.
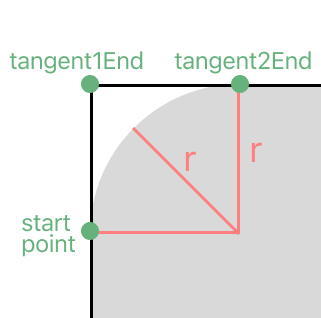
Looking at the addArc) function again:
func addArc(tangent1End p1: CGPoint, tangent2End p2: CGPoint, radius: CGFloat)
We need to assemble 4 parameters:
startPoint(implicit; this is where the "cursor" is)tangent1Endtangent2Endradius
We only know (4) radius.
Despite the potentially 🤔 names, the tangents correspond to the following points on the aforementioned square:
Zooming out to the whole rectangle, if we decide to draw clockwise, that means we'll have 4 arcs with the following points:

Let's alternate drawing lines and arcs, clockwise, and in the following order:
We want the points to be drawn relative to the bounds rectangle. We can use the following helper functions on CGRect to derive the corner points we need:
CGRect.minXCGRect.maxXCGRect.minYCGRect.maxYCGRect.midX(also useful)CGRect.midY(also useful)
If you mix up these helpers while writing drawing code, you're in good company.
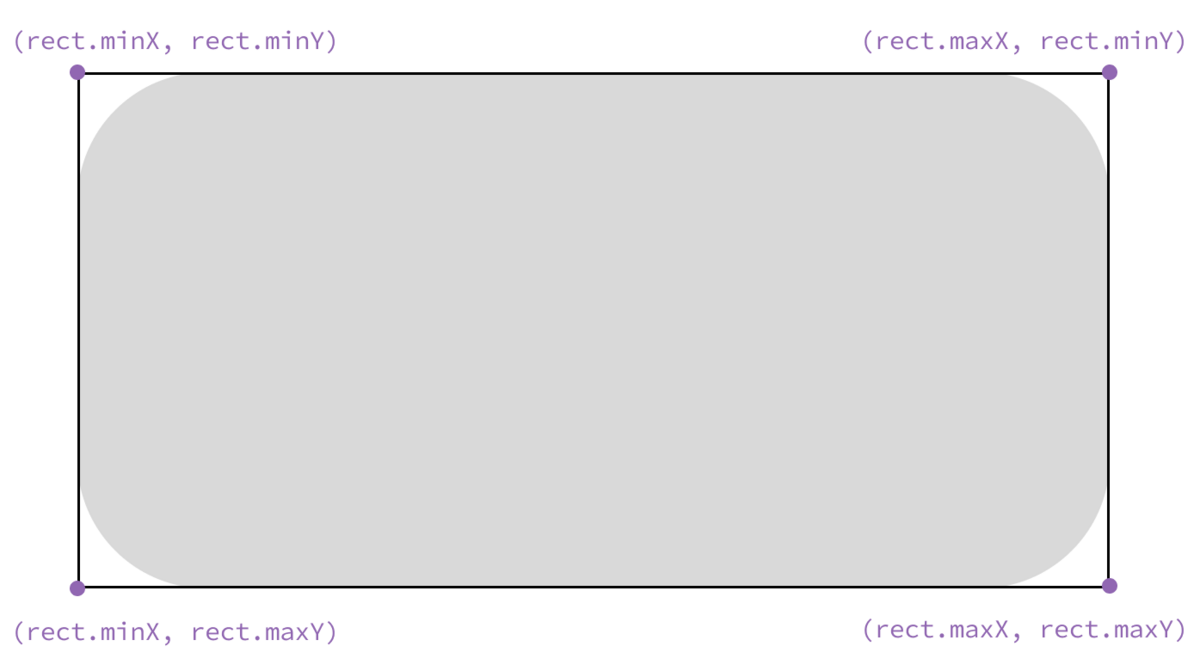
We derive the non-corner points by adding or subtracting the corner radius.
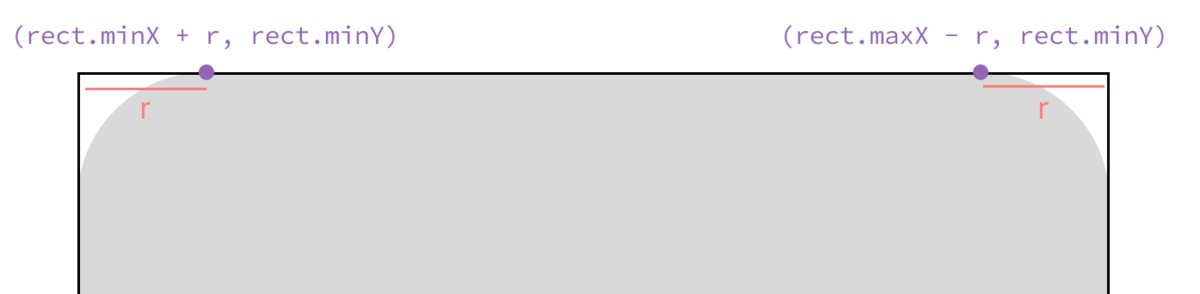
With all the details worked out, all we have to do is arrange the code:
struct RoundedRectArcUnsafeShape: Shape {
    let cornerRadius: CGFloat
    func path(in rect: CGRect) -> Path {
        Path { p in
            p.move(to: .init(x: rect.minX + cornerRadius, y: rect.minY))
            p.addLine(to: .init(x: rect.maxX - cornerRadius, y: rect.minY))
            p.addArc(
                tangent1End: .init(x: rect.maxX, y: rect.minY),
                tangent2End: .init(x: rect.maxX, y: rect.minY + cornerRadius),
                radius: cornerRadius
            )
            p.addLine(to: .init(x: rect.maxX, y: rect.maxY - cornerRadius))
            p.addArc(
                tangent1End: .init(x: rect.maxX, y: rect.maxY),
                tangent2End: .init(x: rect.maxX - cornerRadius, y: rect.maxY),
                radius: cornerRadius
            )
            p.addLine(to: .init(x: rect.minX + cornerRadius, y: rect.maxY))
            p.addArc(
                tangent1End: .init(x: rect.minX, y: rect.maxY),
                tangent2End: .init(x: rect.minX, y: rect.maxY - cornerRadius),
                radius: cornerRadius
            )
            p.addLine(to: .init(x: rect.minX, y: rect.minY + cornerRadius))
            p.addArc(
                tangent1End: .init(x: rect.minX, y: rect.minY),
                tangent2End: .init(x: rect.minX + cornerRadius, y: rect.minY),
                radius: cornerRadius
            )
            p.closeSubpath()
        }
    }
}
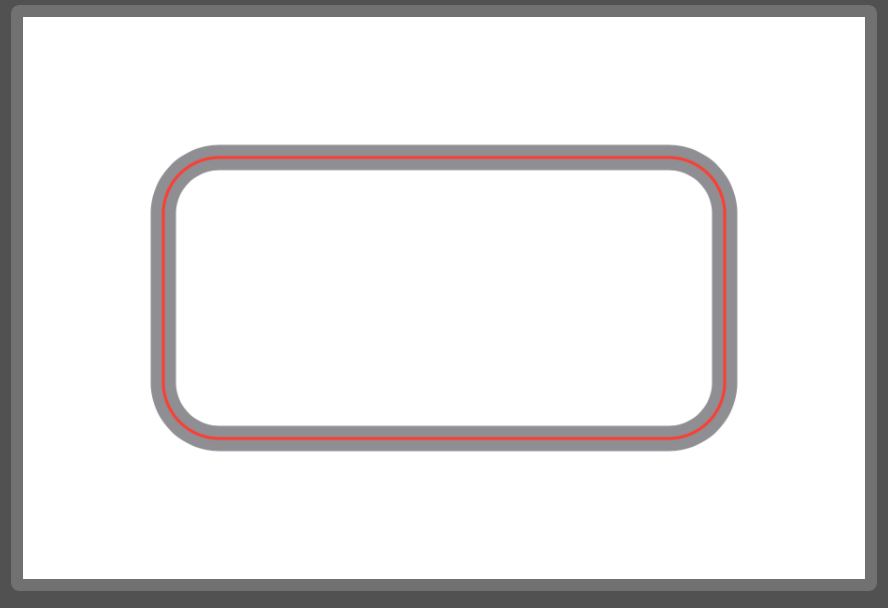
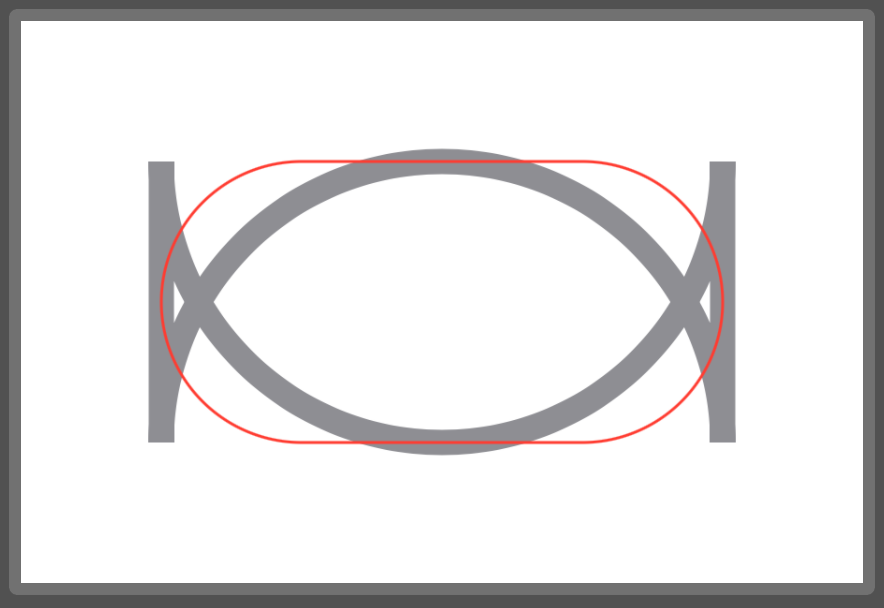
If we overlay SwiftUI's build-in RoundedRectangle shape, ours looks pretty good:
struct RoundedRectArcUnsafeView_Previews: PreviewProvider {
    static var previews: some View {
        let cornerRadius: CGFloat = 20
        ZStack {
            RoundedRectArcUnsafeShape(cornerRadius: cornerRadius)
                .stroke(.gray, lineWidth: 9)
            RoundedRectangle(cornerRadius: cornerRadius, style: .circular)
                .stroke(.red, lineWidth: 1)
        }
        .previewingShape()
    }
}
But what happens if we make cornerRadius something like 100 (when our shape height is 100)?
Looks like SwiftUI's version does some bounds checking so the shape becomes a capsule or circle. Let's fix our implementation:
struct RoundedRectArcShape: Shape {
    let cornerRadius: CGFloat
    func path(in rect: CGRect) -> Path {
        let maxBoundedCornerRadius = min(min(cornerRadius, rect.width / 2.0), rect.height / 2.0)
        let minBoundedCornerRadius = max(maxBoundedCornerRadius, 0.0)
        let boundedCornerRadius = minBoundedCornerRadius
        return Path { p in
            p.move(to: .init(x: rect.minX + boundedCornerRadius, y: rect.minY))
            // ...
        }
    }
}
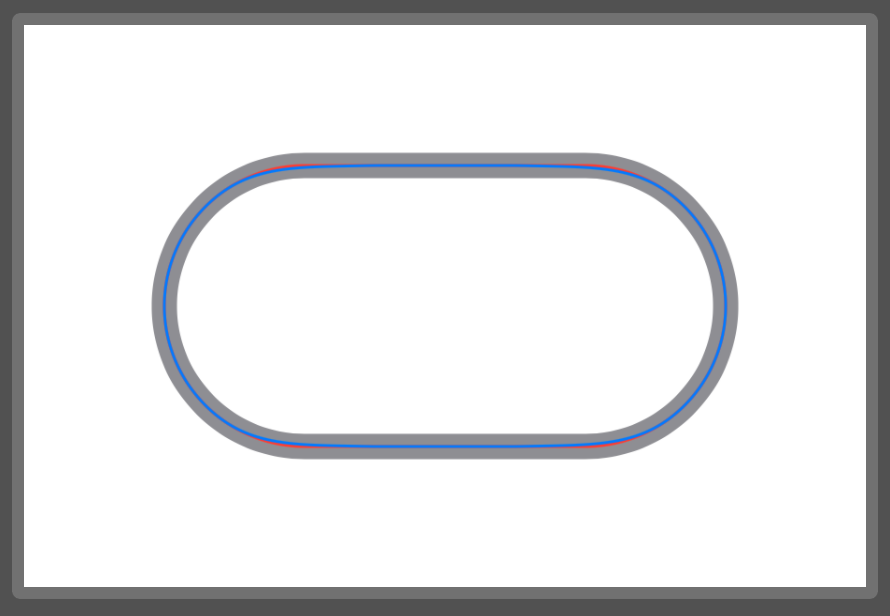
That's better. As a bonus, I'm showing SwiftUI's .continuous corner style in blue over the .circular style in red.
How to use quadratic bezier curves
We often want to avoid the kinds of sharp corners that appear when connecting lines, but don't necessarily want to use circular arcs.
For smoother lines, the Path API gives us:
addCurvefor cubic Bézier curvesaddQuadCurvefor quadratic Bézier curves
Cubic Bézier curves give us a lot of flexibility. They can also be a weighty topic. I recommend this YouTube video by Freya Holmér.
I've found quadratic Bézier curves as a nice compromise between flexibility and complexity, so let's try to quickly build some intuition on how to use them.
Let's start by looking at the addQuadCurve) function:
func addQuadCurve(to p: CGPoint, control cp: CGPoint)
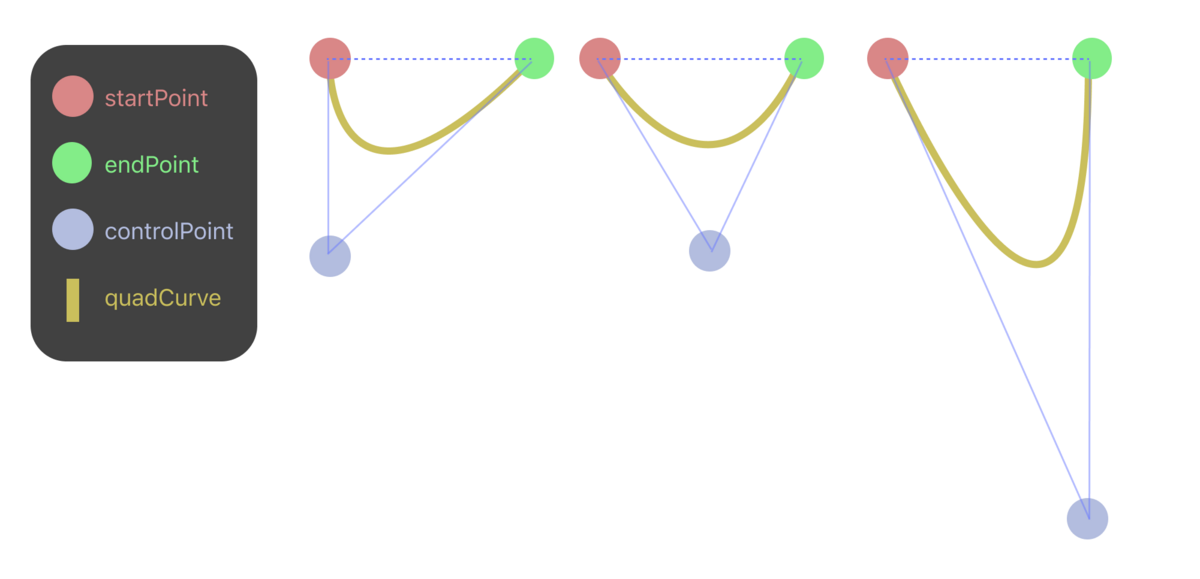
We need to assemble 3 parameters:
startPoint(implicit; this is where the "cursor" is)endPoint(p)controlPoint(cp)
When we set up the three points as various triangles, we can see that the curve is stretched towards the control point.
Calculating the actual positions of the three points will depend on our use case.
Let's say we want to draw a simple quad curve as a "scoop" with the control point at the bottom. But we'll allow the caller to specify a relative position on the x-axis for the control point.
Add the input rectangle to our planning diagram will help us determine how to calculate each of the three points:

With that, here's the code:
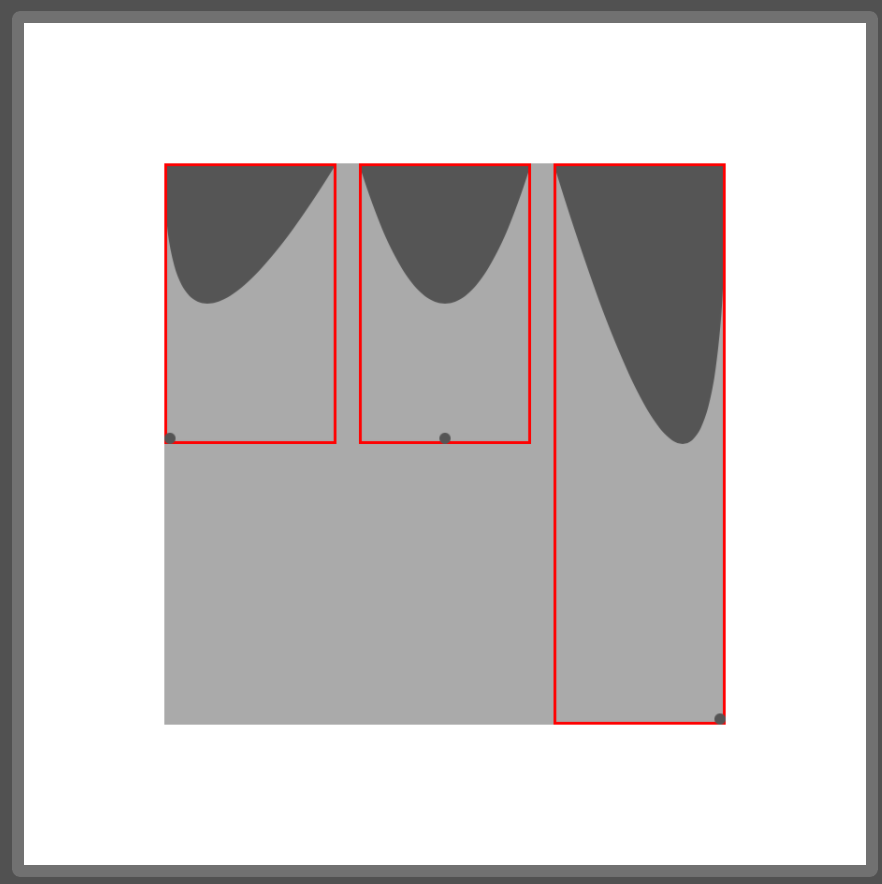
struct QuadCurveScoop: Shape {
    /// 0...1
    var pointOffsetFraction: CGFloat = 0.0

    func path(in rect: CGRect) -> Path {
        Path { p in
            p.move(to: .init(x: rect.minX, y: rect.minY))
            p.addQuadCurve(
                to: .init(x: rect.maxX, y: rect.minY),
                control: .init(x: rect.maxX * pointOffsetFraction, y: rect.maxY)
            )
        }
    }
}
If we don't explicitly close the subpath, SwiftUI presumably closes it for us when drawing.
I've set up the preview to mimic the figure above, and I've added an overlay to show the input rectangle and approximate control point for each curve.
Path operations
Path operations look like set operations: union, intersection, subtracting, etc.
These operations allow us to combine subpaths in unique ways, without necessarily needing to draw line-by-line or arc-by-arc.
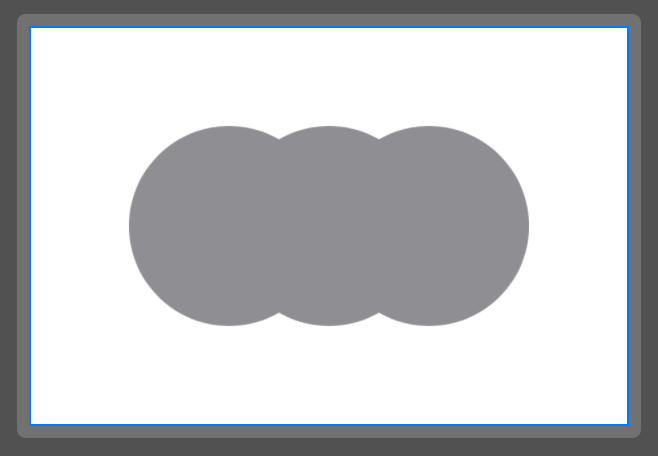
Let's try making a cloud shape by adding together 3 ellipses:
struct Cloud1Shape: Shape {
    func path(in rect: CGRect) -> Path {
        let inset = rect.width / 2.0
        return Path { p in
            p.addEllipse(in: rect.inset(by: .init(top: 0, left: 0, bottom: 0, right: inset)))
            p.addEllipse(in: rect.inset(by: .init(top: 0, left: inset / 2.0, bottom: 0, right: inset / 2.0)))
            p.addEllipse(in: rect.inset(by: .init(top: 0, left: inset, bottom: 0, right: 0)))
        }
    }
}
When we fill it, it looks fine:
struct Cloud1View_Previews: PreviewProvider {
    static var previews: some View {
        Cloud1Shape()
            .fill(.gray)
            .previewingShape()
    }
}
But if we decide to draw an outline instead, it looks like 3 ellipses:
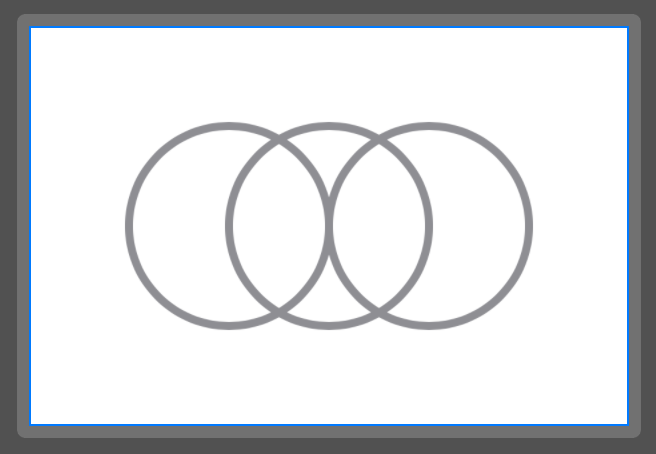
We can fix this by joining the shapes together using the union path operation.
The path operation APIs are available on iOS 16+. Unfortunately, they're defined on CGPath and not Path. It's simple to convert between them, but we'll have to rewrite our path drawing code.
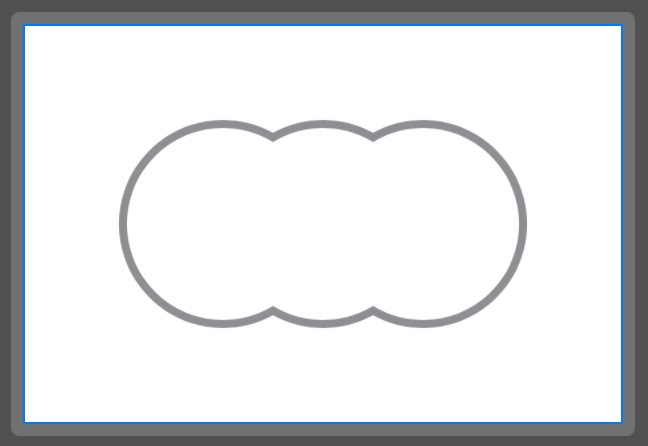
struct Cloud2Shape: Shape {
    func path(in rect: CGRect) -> Path {
        let inset = rect.width / 2.0
        let leftEllipse = Path(ellipseIn: rect.inset(by: .init(top: 0, left: 0, bottom: 0, right: inset)))
        let centerEllipse = Path(ellipseIn: rect.inset(by: .init(top: 0, left: inset / 2.0, bottom: 0, right: inset / 2.0)))
        let rightEllipse = Path(ellipseIn: rect.inset(by: .init(top: 0, left: inset, bottom: 0, right: 0)))
        let combinedCGPath = leftEllipse.cgPath
            .union(centerEllipse.cgPath)
            .union(rightEllipse.cgPath)
        return Path(combinedCGPath)
    }
}
Now when we outline the shape, we get a cloud again.
Creating a chat bubble shape
I used the above techniques to create a chat bubble shape for the onboarding section of the recently decommissioned Tabedori たべドリ app.
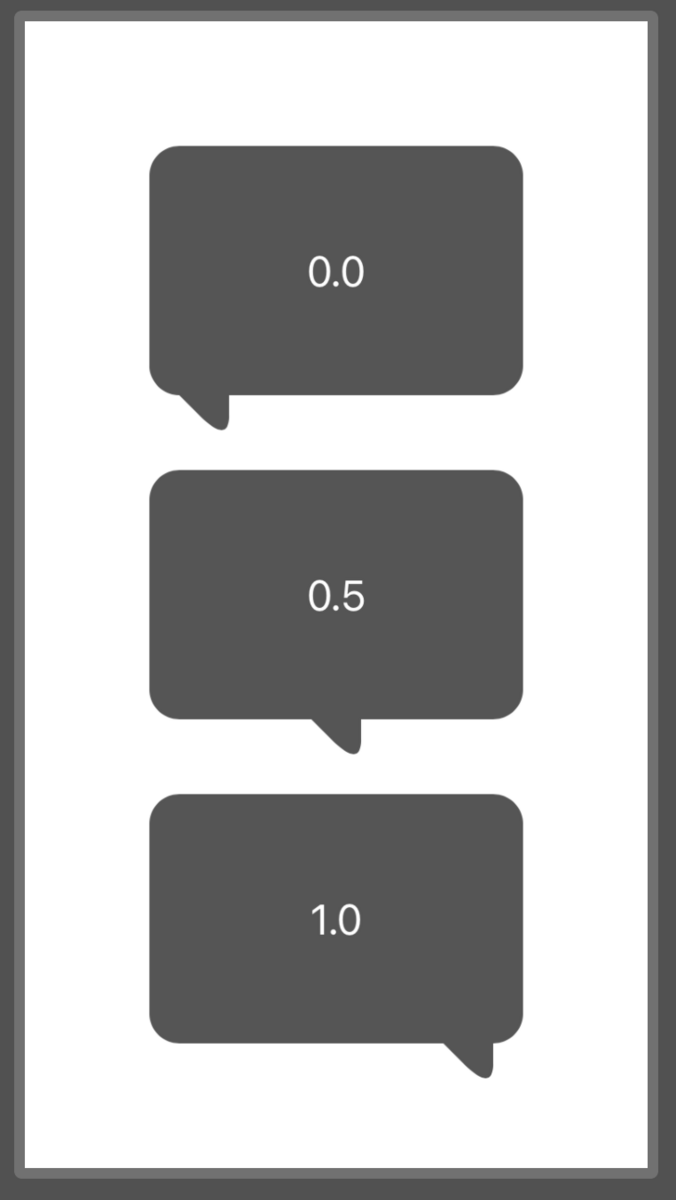
The arrow position on the bottom can be adjusted by providing arrowOffsetFraction.
struct MapOnboardingBubbleShape: Shape {
    var cornerRadius: CGFloat = 12
    var arrowRectSize: CGFloat = 20
    var arcLength: CGFloat = 12

    /// 0.0 = left, 0.5 = center, 1.0 = right
    var arrowOffsetFraction: CGFloat = 0.5

    func baseXPos(for rect: CGRect) -> CGFloat {
        (rect.maxX - cornerRadius - cornerRadius - arrowRectSize) * arrowOffsetFraction + cornerRadius
    }

    func path(in rect: CGRect) -> Path {
        let roundedRect = Path(roundedRect: rect, cornerRadius: cornerRadius)
        let arrowPath = Path { p in
            p.move(to: .init(x: baseXPos(for: rect), y: rect.maxY))
            p.addLine(to: .init(
                x: baseXPos(for: rect) + arrowRectSize - arcLength,
                y: rect.maxY + arrowRectSize - arcLength
            ))
            p.addQuadCurve(
                to: .init(
                    x: baseXPos(for: rect) + arrowRectSize,
                    y: rect.maxY + arrowRectSize - arcLength
                ),
                control: .init(
                    x: baseXPos(for: rect) + arrowRectSize,
                    y: rect.maxY + arrowRectSize
                )
            )
            p.addLine(to: .init(x: baseXPos(for: rect) + arrowRectSize, y: rect.maxY))
            p.closeSubpath()
        }
        let combinedCGPath = roundedRect.cgPath.union(arrowPath.cgPath)
        let combinedPath = Path(combinedCGPath)
        return combinedPath
    }
}
The arrowOffsetFraction is the text inside the bubble.
Here's a screenshot of it in context:

Trimming a path
Animating the path is something that can't be done (easily) with a single static image, but is easy to do with a Shape.
The trim modifier on Shape allows you to draw only a variable fraction of the path.
Since SwiftUI is adept at many kinds of animations, we can use it to animate the path being drawn:
struct DrawBubbleView: View {
    @State var drawFraction: CGFloat = 0

    var body: some View {
        VStack {
            MapOnboardingBubbleShape()
                .trim(from: 0, to: drawFraction)
                .stroke(.gray, lineWidth: 3)
                .animation(.spring(), value: drawFraction)
                .frame(width: 150, height: 100)
                .padding(.bottom, 50)

            Button(drawFraction > 0.0 ? "Hide" : "Show") {
                drawFraction = drawFraction > 0.0 ? 0.0 : 1.0
            }
            .tint(Color.gray)
        }
    }
}
Transition animations
And finally, since Shapes have appearance/disappearance transitions like any other View, we can add a fun springy insertion animation.
struct BubbleTransitionView: View {
    @State var isVisible: Bool = false

    var body: some View {
        VStack {
            ZStack {
                if isVisible {
                    Text("Hello!")
                        .padding(30)
                        .background {
                            MapOnboardingBubbleShape().fill(Color(.systemGray5))
                        }
                        .transition(.opacity.combined(with: .scale).animation(.spring(response: 0.25, dampingFraction: 0.7)))
                }
            }
            .frame(width: 200, height: 100)
            .padding(.bottom, 50)

            Button(isVisible ? "Hide" : "Show") {
                isVisible.toggle()
            }
        }
    }
}
Conclusion
Thanks for reading! I hope this post has led you on a path of enlightenment.